Widget
ReCaptcha.Desktop allows your UI to have the same feeling as if you were using the origignal Google reCAPTCHA widget. But of course you can also customize the ReCaptcha control as you like. You can choose cusotm colors, texts, links and much more. By default ReCaptcha.Desktop has a light and a dark Theme.
The ReCaptcha control is available for WPF, WinUI3 and UWP. Currently there is no support for WinForms.
| WPF | WinUi3 | UWP |
|---|---|---|
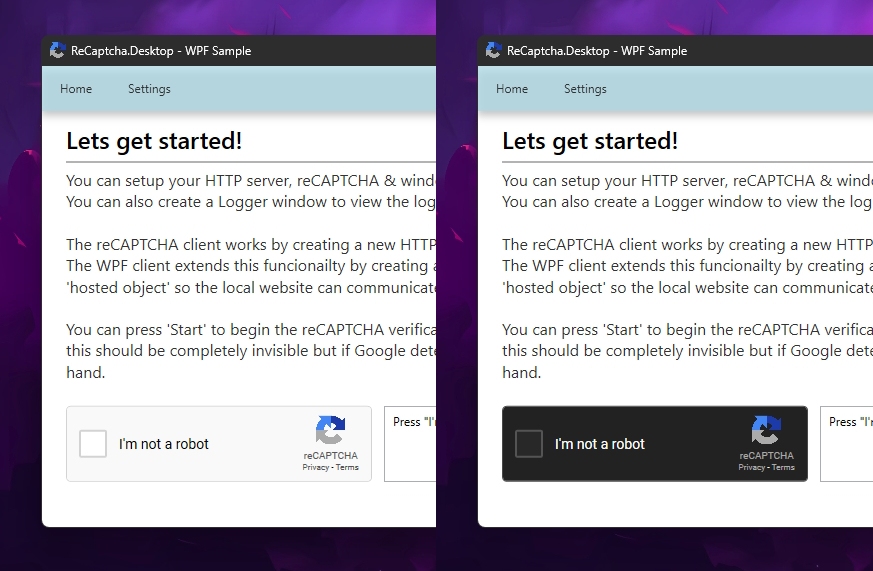 | 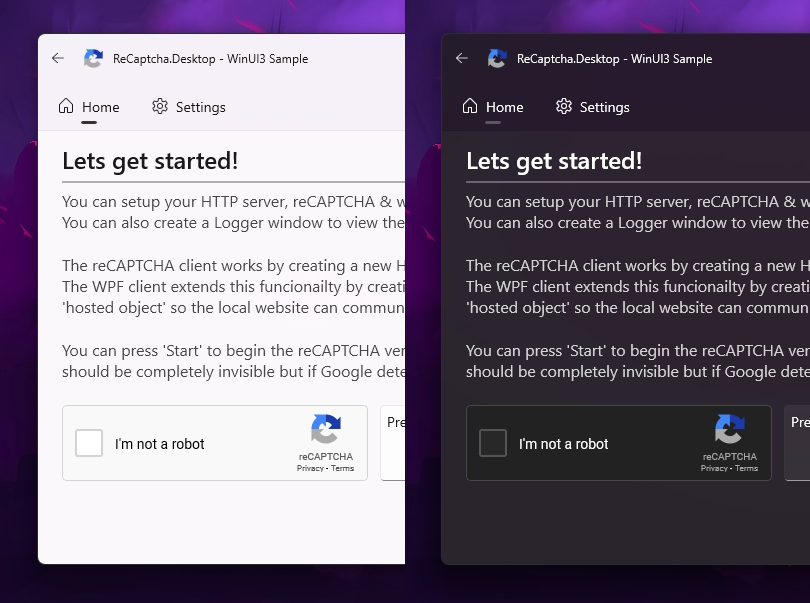 |  |
Installation
Installing ReCaptcha.Desktop to your application is not very hard but it is slightly different for each platform. This section will explain how to prepare your application for using the ReCaptcha control. Before using the widget please follow the instructions here: Getting Started
WPF
- Step 1: Add
ReCaptcha.Desktop.WPF.UInamespaces to your page container
</UserControl
    xmlns:ui="clr-namespace:ReCaptcha.Desktop.WPF.UI;assembly=ReCaptcha.Desktop.WPF"
    xmlns:themes="clr-namespace:ReCaptcha.Desktop.WPF.UI.Themes;assembly=ReCaptcha.Desktop.WPF">

    <!-- YOU PAGE CONTENT -->
</UserCOntrol>
- Step 2: Import the
CommonDictionaryto your App ResourceDictionary
</Application>
    <Application.Resources>
        <ResourceDictionary>
            <ResourceDictionary.MergedDictionaries>
                <CommonDictionary xmlns="clr-namespace:ReCaptcha.Desktop.WPF.UI;assembly=ReCaptcha.Desktop.WPF" />
            </ResourceDictionary.MergedDictionaries>

        <!-- OITHER APP RESOURCES -->
        </ResourceDictionary>
    </Application.Resources>
</Application>
WinUI3
- Step 1: Add
ReCaptcha.Desktop.WinUI.UInamespaces to your page container
</Page
    xmlns:ui="using:ReCaptcha.Desktop.WinUI.UI"
    xmlns:themes="using:ReCaptcha.Desktop.WinUI.UI.Themes">

    <!-- YOU PAGE CONTENT -->
</UserCOntrol>
- Step 2: Import the
CommonDictionaryto your App ResourceDictionary
</Application>
    <Application.Resources>
        <ResourceDictionary>
            <ResourceDictionary.MergedDictionaries>
                <XamlControlsResources xmlns="using:Microsoft.UI.Xaml.Controls" /> <!-- Required for WinUI3 -->
                <CommonDictionary xmlns="using:ReCaptcha.Desktop.WinUI.UI" />
            </ResourceDictionary.MergedDictionaries>

            <!-- OITHER APP RESOURCES -->
        </ResourceDictionary>
    </Application.Resources>
</Application>
UWP
- Step 1: Add
ReCaptcha.Desktop.UWP.UInamespaces to your page container
</Page
    xmlns:ui="using:ReCaptcha.Desktop.UWP.UI"
    xmlns:themes="using:ReCaptcha.Desktop.UWP.UI.Themes">

    <!-- YOU PAGE CONTENT -->
</UserCOntrol>
- Step 2: Import the
CommonDictionaryto your App ResourceDictionary
</Application>
    <Application.Resources>
        <ResourceDictionary>
            <ResourceDictionary.MergedDictionaries>
                <CommonDictionary xmlns="using:ReCaptcha.Desktop.UWP.UI" />
            </ResourceDictionary.MergedDictionaries>

        <!-- OITHER APP RESOURCES -->
        </ResourceDictionary>
    </Application.Resources>
</Application>
Control
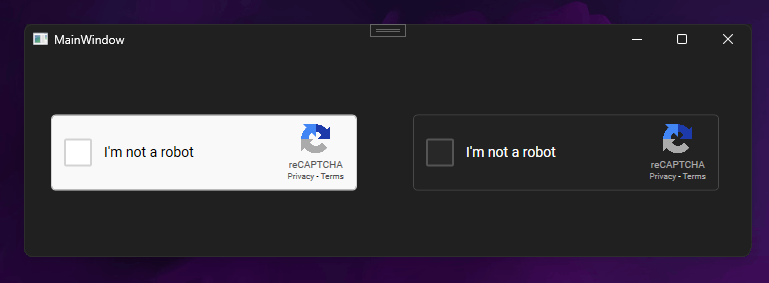
By simply adding the control to your visual tree, you can see that it looks exactly like the Google reCAPTCHA widget. By not setting any properties the control will act like a normal checkbox
<ui:ReCaptcha />
Themes
Like said before, ReCaptcha.Desktop supports varios themes. The default theme is Light which mimics the Google reCAPTCHA colors. There is also an out of the box Dark theme which mimics Googles dark mode colors.
<ui:ReCaptcha>
    <ui:ReCaptcha.Theme>
        <themes:LightTheme />
    </ui:ReCaptcha.Theme>
</ui:ReCaptcha>

<ui:ReCaptcha>
    <ui:ReCaptcha.Theme>
        <themes:DarkTheme />
    </ui:ReCaptcha.Theme>
</ui:ReCaptcha>
Custom Themes
Of course you can customize the Theme of the ReCaptcha control all by yourself. You can decide if you want to edit a "base theme" or create a full custom theme all by yourself.
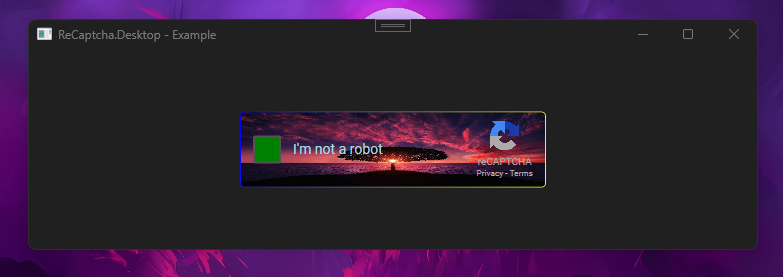
Edit a base theme
To edit a base theme you first have to decide if you want to use a light or dark theme as your base. Then you can just edit the properties on that theme. All type of brushes are supported, even ImageBrushes.
<ui:ReCaptcha>
    <ui:ReCaptcha.Theme>
        <themes:DarkTheme
            CheckBoxBackground="Green"
            CheckBoxCheckmark="Pink"
            Foreground="LightBlue">

            <themes:DarkTheme.Background>
                <ImageBrush ImageSource="https://cdn.pixabay.com/photo/2015/04/23/22/00/tree-736885_1280.jpg" />
            </themes:DarkTheme.Background>

            <themes:DarkTheme.Border>
                <LinearGradientBrush>
                    <GradientStop Offset="0" Color="Blue" />
                    <GradientStop Offset="1" Color="Yellow" />
                </LinearGradientBrush>
            </themes:DarkTheme.Border>
        </themes:DarkTheme>
    </ui:ReCaptcha.Theme>
</ui:ReCaptcha>
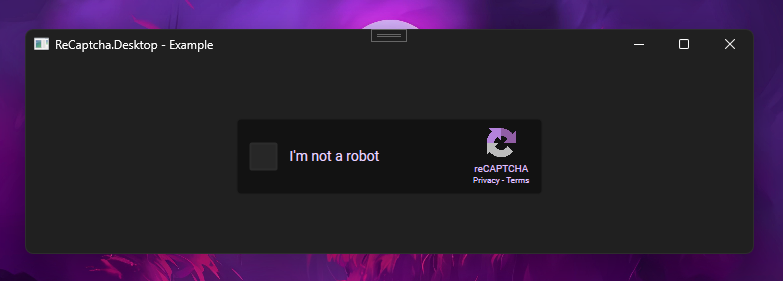
Create a custom theme
If you want to reuse your theme multiple times without storing a theme somewhere in your application you can also create a custom theme by just creating a new class and inheriting from the Interface ITheme.
public class MyTheme : ITheme
{
    public Brush Background { get; } = new SolidColorBrush(Color.FromRgb(18, 18, 18));

    public Brush Border { get; } = new SolidColorBrush(Color.FromRgb(29, 29, 29));

    public Brush Foreground { get; } = new SolidColorBrush(Color.FromRgb(236, 214, 255));
    public Brush ForegroundSecondary { get; } = new SolidColorBrush(Color.FromRgb(225, 194, 252));

    public Brush Error { get; } = new SolidColorBrush(Color.FromRgb(255, 0, 0));

    public Brush CheckBoxBackground { get; init; } = new SolidColorBrush(Color.FromRgb(39, 39, 39));
    public Brush CheckBoxBackgroundHover { get; init; } = new SolidColorBrush(Color.FromRgb(44, 44, 44));
    public Brush CheckBoxBackgroundPressed { get; init; } = new SolidColorBrush(Color.FromRgb(45, 45, 45));

    public Brush CheckBoxBorder { get; init; } = new SolidColorBrush(Color.FromRgb(44, 44, 44));
    public Brush CheckBoxBorderHover { get; init; } = new SolidColorBrush(Color.FromRgb(45, 45, 45));
    public Brush CheckBoxBorderPressed { get; init; } = new SolidColorBrush(Color.FromRgb(50, 50, 50));

    public Brush CheckBoxSpinner { get; init; } = new SolidColorBrush(Color.FromRgb(187, 134, 252));
    public Brush CheckBoxCheckmark { get; init; } = new SolidColorBrush(Color.FromRgb(187, 134, 252));
}
<ui:ReCaptcha Icon="/assets/icon.png">
    <ui:ReCaptcha.Theme>
        <customThemes:MyTheme />
    </ui:ReCaptcha.Theme>
</ui:ReCaptcha>
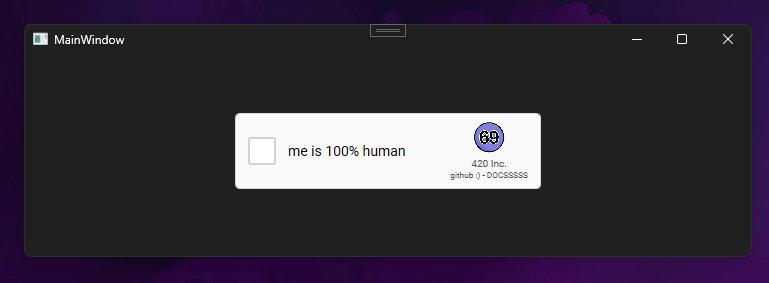
Text & Assets
As you may already noticed, the official Google reCAPTCHA widget has a I'm not a robot label in the center, a reCAPTCHA icon with label on the right side and underneath 2 hyperlinks for Privacy and Terms. ReCaptcha.Desktop allows you to customize everything about that.
- The
Contentproperty allows you to edit the main text on the widget - The
Iconproperty allows you to set a custom image as the reCAPTCHA icon - THe
TItleproperty allows you to edit the reCAPTCHA label - The
FirstUri&SecondtUriproperty allow you to set a custom URL for the two hyperlinks - The
FirstUriText&SecondtUriTextproperty allow you to edit the text of the two hyperlinks A customized widget may look like this:
<ui:ReCaptcha
   Title="420 Inc."
   Content="me is 100% human"
   FirstUri="https://github.com/IcySnex/ReCaptcha.Desktop"
   FirstUriText="github :)"
   Icon="https://cdn-icons-png.flaticon.com/512/9061/9061613.png"
   SecondaryUri="https://icysnex.github.io/ReCaptcha.Desktop/"
   SecondaryUriText="DOCSSSSS" />