How to use (MVVM)
Using the ReCaptcha control in your applications is really easy and the exact same for all supported platforms (WPF, WinUI3, UWP). This guide will explain how to use the ReCaptcha.Desktop with the control inside a MVVM application.
For this example we use WPF with Dependency Injection and the CommunityToolkit.MVVM library but you can use whatever you prefer, just make sure you correctly set up your project for MVVM and Dependency Injection.
Step 1: Install ReCaptcha.Desktop package
dotnet add <PROJECT> package ReCaptcha.Desktop.WPF # WPF
dotnet add <PROJECT> package ReCaptcha.Desktop.WinUI # WinUI3
dotnet add <PROJECT> package ReCaptcha.Desktop.UWP # UWP
Step 2: Add ReCaptcha service to your App ServiceProvider
This example project uses the Microsoft.Extensions.Logging logging infrastructure but you can also use any other logger like Serilog. ReCaptcha.Desktop supports out of the box logging. Just pass in a ILogger<IReCaptchaClient> into the constructor and you are good to go.
This is what a simple example App.cs class could look like:
readonly IHost host;
public static IServiceProvider Provider { get; private set; } = default!;

public App()
{
    host = Host.CreateDefaultBuilder()
        .ConfigureLogging(logging =>
        {
            logging.ClearProviders();
            logging.AddDebug();
        })
        .ConfigureServices((context, services) =>
        {
            // Add Services
            services.AddSingleton<IReCaptchaClient>(provider => new ReCaptchaClient(
                "GOOGLE_SITE_KEY".AsReCaptchaConfig("HOST_NAME"),
                "WINDOW_TITLE".AsWindowConfig(),
                provider.GetRequiredService<ILogger<IReCaptchaClient>>()));

            // Add ViewModels

        })
        .Build();
    Provider = host.Services;
}
Step 3: Create a new View and ViewModel
The View is called CaptchaView. In a real world application you probably have a ViewModelLocator or something like that but for now we will just set the DataContext of the view in the constrcutor:
public CaptchaView()
{
    InitializeComponent();
    DataContext = App.Provider.GetRequiredService<CaptchaViewModel>();
}
The ViewModel is called CaptchaViewModel. We will get a ILogger<T> and the ReCaptchaClient through the constructor sicne we are using Dependency Injection:
public class CaptchaViewModel : ObservableObject
{
    readonly ILogger<CaptchaViewModel> logger;
    readonly IReCaptchaClient reCaptcha;

    public CaptchaViewModel(
        ILogger<CaptchaViewModel> logger,
        IReCaptchaClient reCaptcha)
    {
        this.logger = logger;
        this.reCaptcha = reCaptcha;
    }
}
Make sure to add the ViewModel to your App ServiceProvider:
...
// Add ViewModels
services.AddSingleton<CaptchaViewModel>();
...
Step 4: Add an User Interface
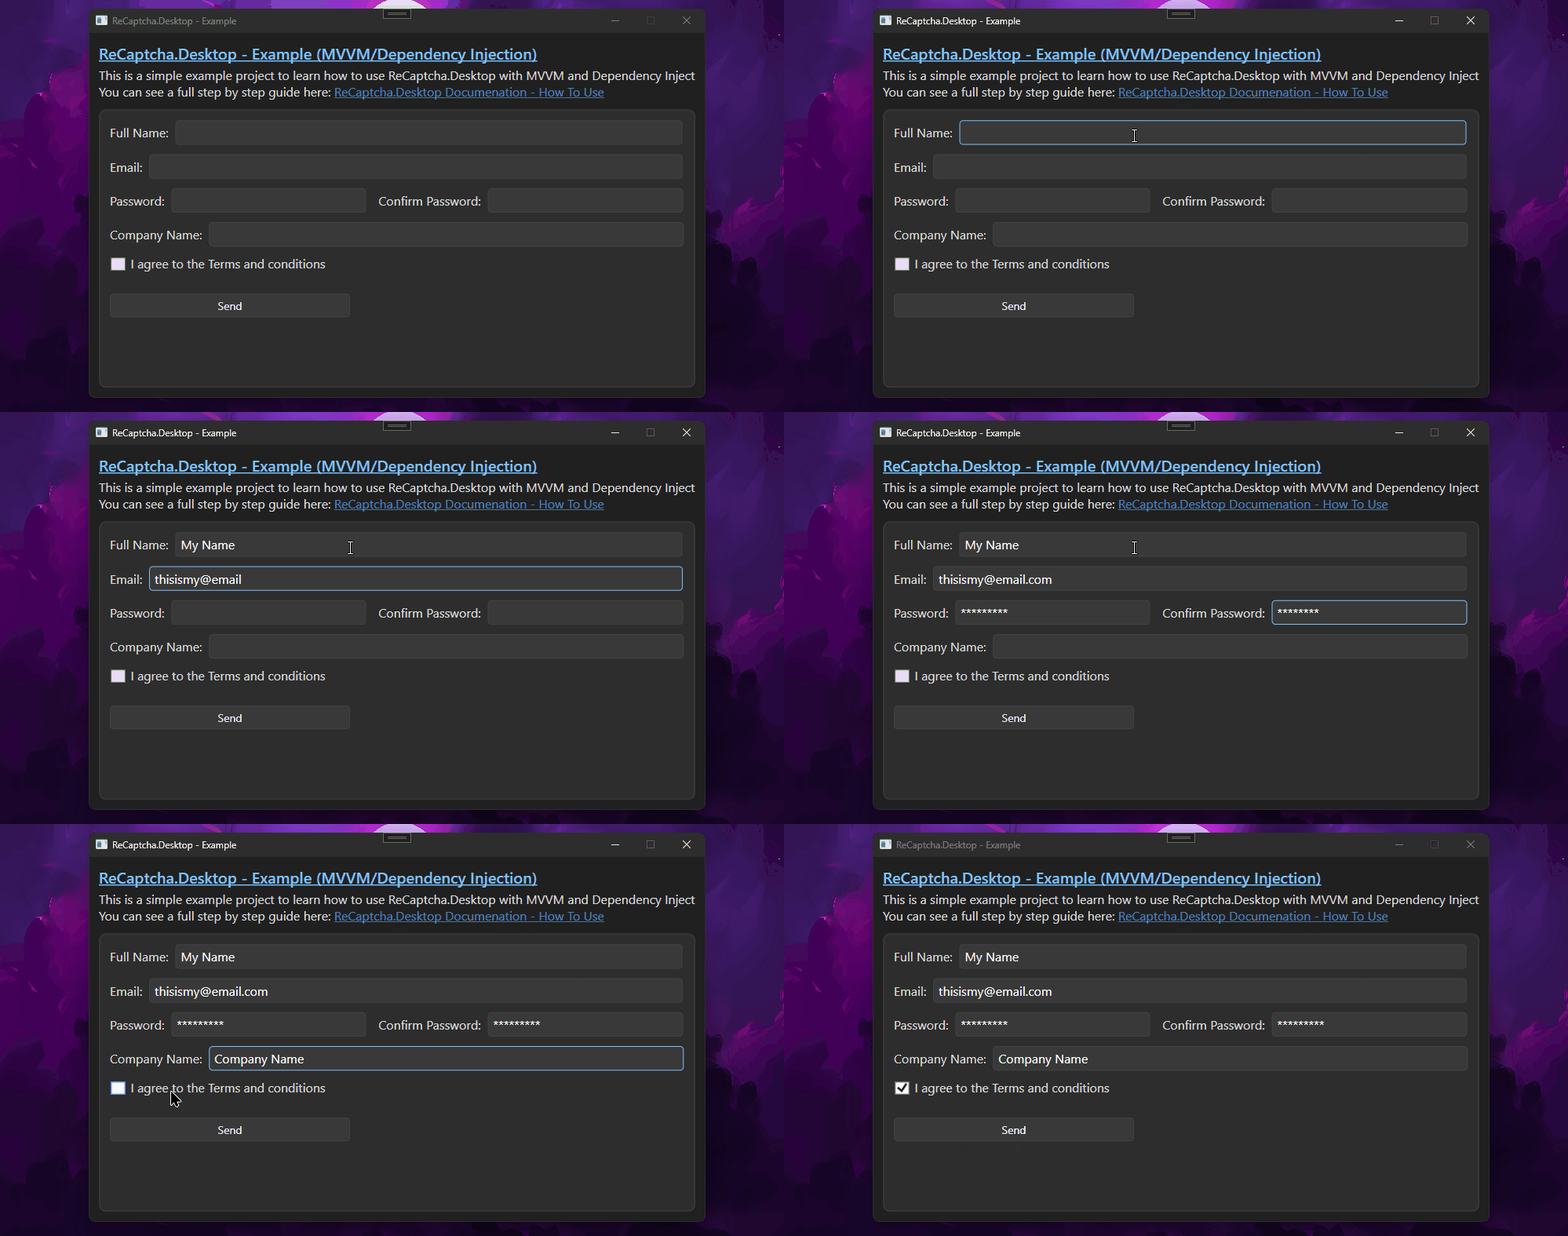
This is an example "user registration" form. You can view the full XAML code on GitHub
Step 5: Add logic to your ViewModel
The ReCaptcha.Desktop widget supports both MVVM and non-MVVM applications so you can also use EventHandlers instead of Commands and edit the control properties without Bindings.
// The verification will return an official Google reCAPTCHA token which could be used to verify other Google services
[ObservableProperty]
string? token = null;

// This property enables/disables the checked state on the reCAPTCHA widget
[ObservableProperty]
bool isChecked = false;

// This property enables/Disables the loading indicator on the reCAPTCHA widget
[ObservableProperty]
bool isLoading = false;

// This property allows you to show an error message on the reCAPTCHA widget. null if no error
[ObservableProperty]
string? errorMessage = null;


CancellationTokenSource? cancellationTokenSource = null;

// This method will request a new verification
[RelayCommand]
async Task VerifyAsync()
{
    // Remove any error message if existing and indicate loading
    ErrorMessage = null;
    IsLoading = true;

    try // Start verification
    {
        // Create a new cancellation source with a timeout of one minute
        cancellationTokenSource = new(TimeSpan.FromMinutes(1));
        Token = await reCaptcha.VerifyAsync(cancellationTokenSource.Token);
    }
    catch (TaskCanceledException) // The Verification was cancelled by the user or it timed out
    {
        // Reset token and uncheck
        Token = null;
        IsChecked = false;
    }
    catch (Exception ex) // Unexpected error was thrown
    {
        // Reset token, Set error message and uncheck
        Token = null;
        IsChecked = false;
        ErrorMessage = ex.Message;
    }
    finally
    {
        // Disable loading and reset cancellation source
        IsLoading = false;
        cancellationTokenSource = null;
    }
}

// This method will remove the verification or cancel it if currently verificating
[RelayCommand]
void RemoveVerification()
{
    // Reset token and cancel verification if not already reset
    Token = null;
    cancellationTokenSource?.Cancel();
}


// Send a new registration or whatever
[RelayCommand]
void SendRegistration()
{
    if (Token is null)
    {
        MessageBox.Show("Please confirm that you are not a robot!", "Verification failed!", MessageBoxButton.OK, MessageBoxImage.Error);
        return;
    }

    // Verification was successful. Here could be a call to another API which requires an official Google reCAPTCHA token
    MessageBox.Show($"Token: {Token}", "Verification successful!", MessageBoxButton.OK, MessageBoxImage.Information);
}
Step 6: Add reCAPTCHA widget
Befroe you can start using the ReCaptcha control in your user interface, you have to follow the steps on the Widget Installation guide.
After installing the necessary resources to your App you can just add the <ui:ReCaptcha /> control to your visual tree. Make sure to bind all properties and commands set in the ViewModel.
<ui:ReCaptcha
    HorizontalAlignment="Left"
    ErrorMessage="{Binding ErroMessage}"
    IsChecked="{Binding IsChecked, Mode=TwoWay}"
    IsLoading="{Binding IsLoading}"
    VerificationRemovedCommand="{Binding RemoveVerificationCommand}"
    VerificationRequestedCommand="{Binding VerifyCommand}">
    <ui:ReCaptcha.Theme>
        <themes:DarkTheme />
    </ui:ReCaptcha.Theme>
</ui:ReCaptcha>
Final Product
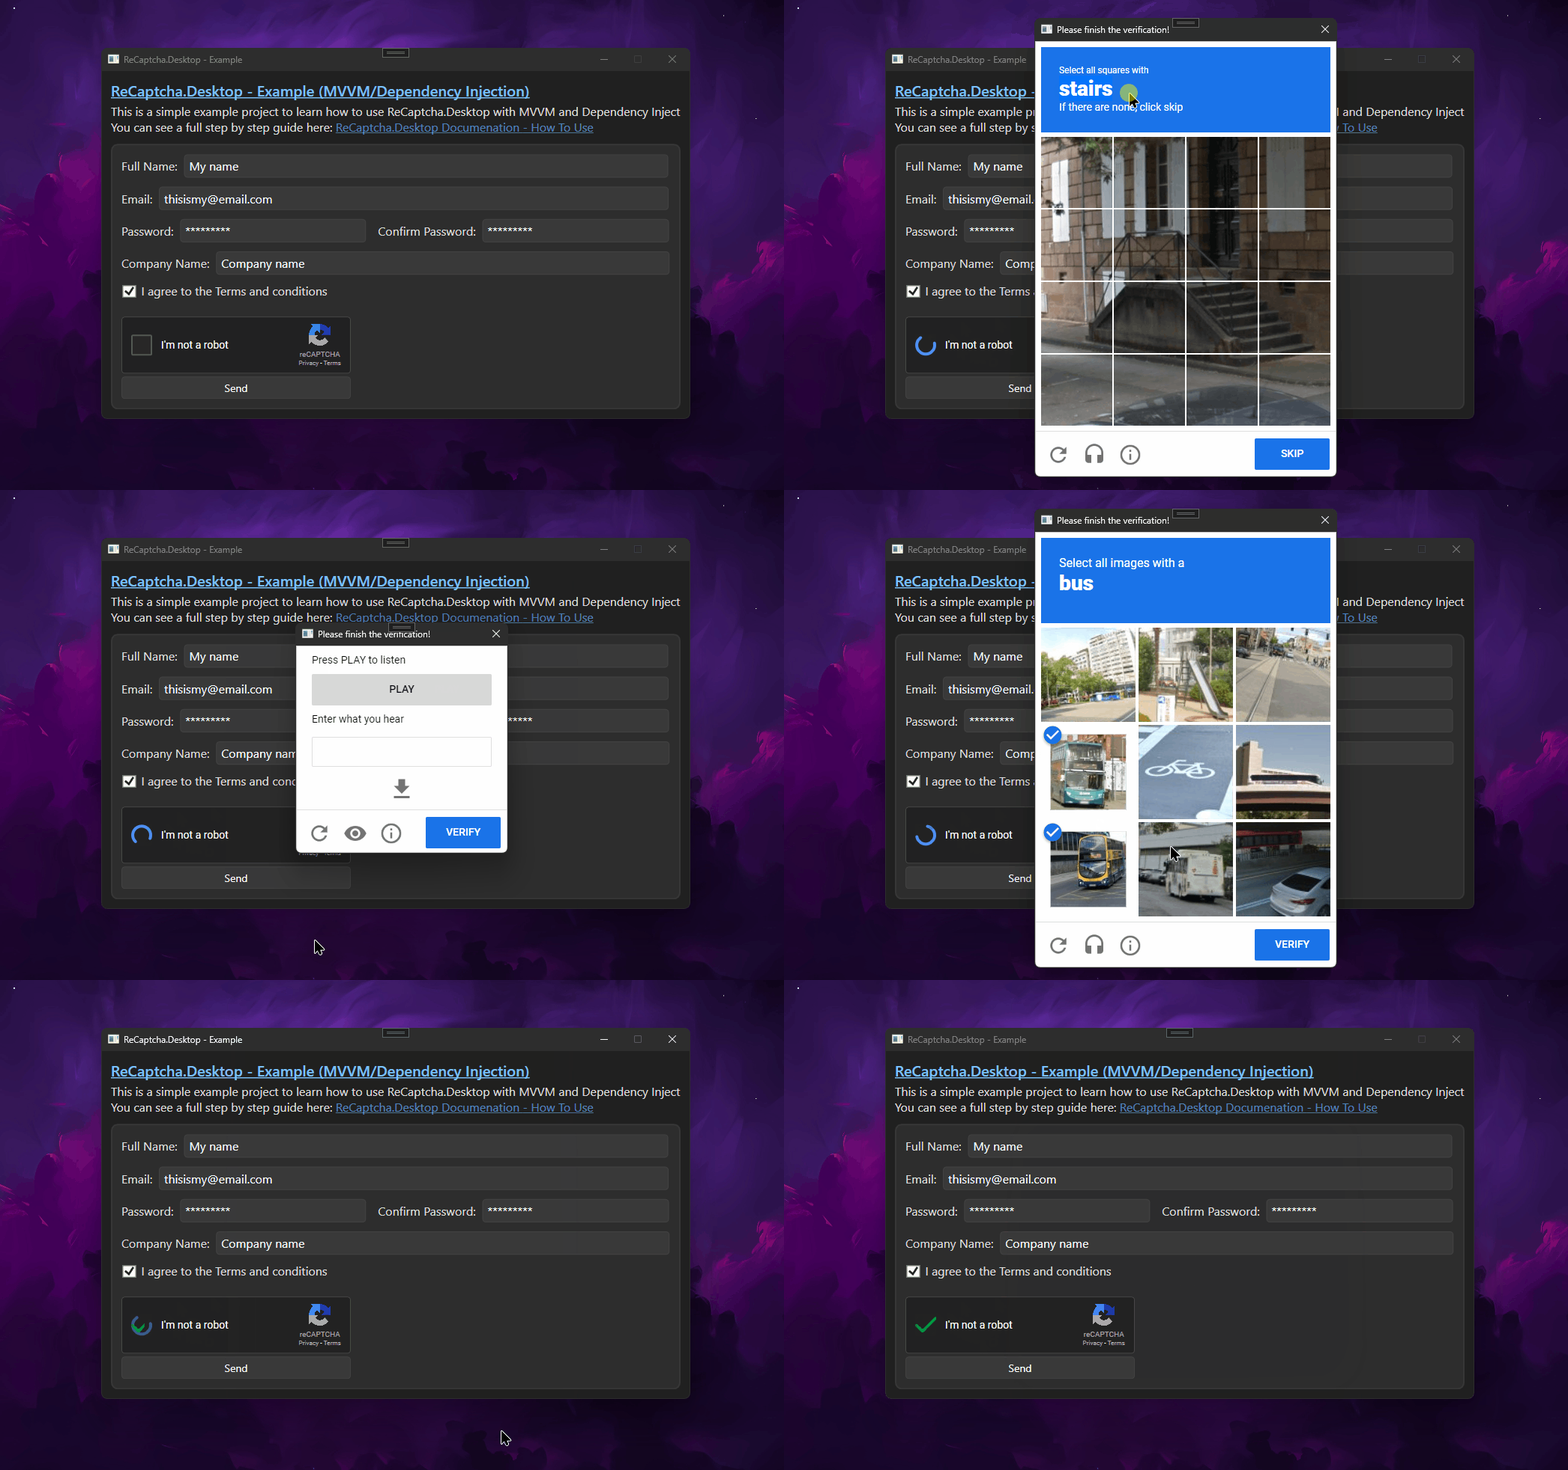
If you did everything correct your application should look like this: 
It may happen that Google requests user input for the verification. But dont worry, ReCaptcha.Desktop fully supports reCAPTCHA, even audio challanges. The ReCaptcha popup will look like this: 
As you can see ReCaptcha.Desktop works perfectly and looks just like the origianl Google reCAPTCHA widget. And as you noticed, it was not really hard to set up, right? The full code for this example is on GitHub, if you're interested. Good luck, verifying!