This guide will walk you through the process of creating your own Melora Metadata plugins so you can easily customize how metadata gets written to your tracks. In this example, we'll create a Metadata Plugin which focuses on optimized metadata for ITunes.
If you're new to Metadata plugins, please refer to the Beginner's Guide for an introduction.
Setup
Before diving into coding your new shiny Melora plugin, it's important to first follow the plugin development Getting Started Guide. This guide will walk you through setting up your IDE, project, and plugin bundle manifest, ensuring you're fully prepared to start developing your plugin.
Structure
Before you begin, it's helpful to organize your plugin bundle with the following structure:
└─ Melora.Metadata.<NAME>
   ├─ Internal
   │  └─ ...
   ├─ Manifest.json
└─ <NAME>Plugin.cs- Root: It's recommended to place all plugins (classes that implement IPlugin) in the root of your plugin bundle. The manifest should also be here.
- Internal: Organize additional components - such as models, helper classes - within an Internal namespace. This structure keeps your plugin organized and ensures that your main functionalities are easily accessible while keeping auxiliary components neatly separated.
Implementing Your Plugin
Step 1: The Manifest
To ensure Melora understands what your plugin bundle does, you first need to provide some essential information via a manifest file. This file tells Melora about your plugin’s purpose, author, and more. For instructions on adding the manifest to your project, refer to the Getting Started Guide.
Example:
{
  "Name": "ITunes",
  "Description": "Writes optimized metadata support specifically for iTunes for .m4a tracks.",
  "Author": "IcySnex",
  "ApiVersion": "1.0.0",
  "LastUpdatedAt": "2024-09-01T11:32:30Z",
  "SourceUrl": "https://github.com/IcySnex/Melora/tree/main/Plugins/Melora.Metadata.ITunes",
  "DownloadUrl": "https://github.com/IcySnex/Melora/releases/download/v1.0.0-stable/Melora.Metadata.ITunes.mlr",
  "PluginKinds": [
    1
  ],
  "EntryPoint": "Melora.Metadata.ITunes.dll",
  "Dependencies": [
    "ATL.dll",
    "Ude.NetStandard.dll",
    "System.Drawing.Common.dll",
    "Microsoft.Win32.SystemEvents.dll"
  ]
}
Step 2: The Plugin Class
- Create a new class called
<NAME>Plugin.csin the root of your project. - This class should inherit from
MetadataPlugin, which itself implements theIPlugininterface.
public class ITunesPlugin : MetadataPlugin
{
    public override Task WriteAsync(
        string filePath,
        DownloadableTrack track,
        CancellationToken cancellationToken = default) =>
        throw new NotImplementedException();
}
Methods:
| Method | Description |
|---|---|
WriteAsync | Writes the metadata for the DownloadableTrack to the audio file located at the filePath. |
Step 3: The Constructors
The MetadataPlugin class requires a few key pieces of information from your plugin, which are passed through its constructor. Here’s a breakdown of the parameters:
| Parameter | Description |
|---|---|
string name | The name of the plugin. This will be used to display your plugin in the Melora client UI. |
string iconPathData | The svg path data for the plugin icon. This will be used to display your plugin in the Melora client UI. |
MetadataPlugin config | The config the plugin gets initialized with. Learn more about plugin configs here. |
ILogger<IPlugin>? logger | An optional logger. |
- Your plugin's constructor will need to pass these parameters when calling the base class constructor to properly initialize the
MetadataPlugin.
Example:
The Melora client will attempt to use various constructors based on your implementation and if a config is already saved for your plugin. Thats why you need to implement multiple constructors.
- Here are the required constructors if you plan on using logging in your plugin:
public ITunesPlugin(MetadataPluginConfig? config, ILogger<IPlugin>? logger) : base(
    name: "iTunes",
    iconPathData: "M312.8 371.2c-1.8.2-3.6.3-5.4.3-21.8 0-39.5-16.4-41.1-38.1-1.8-23.6 16-45.1 39.6-48.1 5.2-.7 10.5-.4 15.4.8v-94.4L229 209v128c0 .2 0 .5-.1.7v.1c1.7 23.5-16 45-39.6 48-1.8.2-3.6.3-5.4.3-21.8 0-39.5-16.4-41.1-38.1-1.8-23.6 15.9-45.1 39.6-48.1 5.2-.6 10.4-.3 15.4.9V155.1c0-2 1.5-3.8 3.5-4.1l146-24.9h.1c1.1-.2 2.3 0 3.2.6 1.3.8 2 2.3 1.9 3.8v.5 191.5.6.1c1.7 23.5-16.1 45.1-39.7 48zM256 0C114.8 0 0 114.8 0 256s114.8 256 256 256 256-114.8 256-256S397.2 0 256 0zm153.6 409.6c-41 41-95.6 63.6-153.6 63.6s-112.6-22.6-153.6-63.6S38.8 314 38.8 256s22.6-112.6 63.6-153.6S198 38.8 256 38.8s112.6 22.6 153.6 63.6S473.2 198 473.2 256s-22.6 112.6-63.6 153.6z",
    config: new(
        defaultOptions:
        [
            new SelectableOption("Media Type", "The media type iTunes will recognize downloaded tracks as.", "Music", ["Music", "Audiobook", "Music Video", "Movie", "TV Show", "Booklet""Ringtone",  "Podcast", "iTunes U"]),
            new StringOption("Account", "The email address of the iTunes account used to 'purchase' downloaded track.", "", 25),
            new StringOption("Owner", "The name of the account used to 'purchase' downloaded track.", "", 25),
            new BoolOption("Current Date as Release", "Whether to set the current date as the release date.", false),
            new BoolOption("Save Artwork", "Whether to save the artwork.", true),
            new IntOption("Artwork Resolution", "The resolution (nXn) the artwork gets resized to before saving.", 512, 32, 1024)
        ],
        initialConfig: config),
    logger: logger)
{ }

public ITunesPlugin(ILogger<IPlugin>? logger) : this(null, logger)
{ }- If you don’t need logging in your plugin, use these constructors:
public ITunesPlugin(MetadataPluginConfig? config) : base(
    name: "iTunes",
    iconPathData: "M312.8 371.2c-1.8.2-3.6.3-5.4.3-21.8 0-39.5-16.4-41.1-38.1-1.8-23.6 16-45.1 39.6-48.1 5.2-.7 10.5-.4 15.4.8v-94.4L229 209v128c0 .2 0 .5-.1.7v.1c1.7 23.5-16 45-39.6 48-1.8.2-3.6.3-5.4.3-21.8 0-39.5-16.4-41.1-38.1-1.8-23.6 15.9-45.1 39.6-48.1 5.2-.6 10.4-.3 15.4.9V155.1c0-2 1.5-3.8 3.5-4.1l146-24.9h.1c1.1-.2 2.3 0 3.2.6 1.3.8 2 2.3 1.9 3.8v.5 191.5.6.1c1.7 23.5-16.1 45.1-39.7 48zM256 0C114.8 0 0 114.8 0 256s114.8 256 256 256 256-114.8 256-256S397.2 0 256 0zm153.6 409.6c-41 41-95.6 63.6-153.6 63.6s-112.6-22.6-153.6-63.6S38.8 314 38.8 256s22.6-112.6 63.6-153.6S198 38.8 256 38.8s112.6 22.6 153.6 63.6S473.2 198 473.2 256s-22.6 112.6-63.6 153.6z",
    config: new(
        defaultOptions:
        [
            new SelectableOption("Media Type", "The media type iTunes will recognize downloaded tracks as.", "Music", ["Music", "Audiobook", "Music Video", "Movie", "TV Show", "Booklet""Ringtone",  "Podcast", "iTunes U"]),
            new StringOption("Account", "The email address of the iTunes account used to 'purchase' downloaded track.", "", 25),
            new StringOption("Owner", "The name of the account used to 'purchase' downloaded track.", "", 25),
            new BoolOption("Current Date as Release", "Whether to set the current date as the release date.", false),
            new BoolOption("Save Artwork", "Whether to save the artwork.", true),
            new IntOption("Artwork Resolution", "The resolution (nXn) the artwork gets resized to before saving.", 512, 32, 1024)
        ],
        initialConfig: config),
    logger: null)
{ }

public ITunesPlugin() : this(null)
{ }
Note
It is always recommended to use logging in your plugin. This makes debugging easier if a user ever encounters any issues.
Especially since it's very easy to implement logging with Melora's plugin infrastructure.
Step 4: Validate
Before proceeding, ensure that everything is set up correctly. If you have followed the Getting Started Guide and cloned/forked the Melora Solution, you should be able to validate your plugin as follows:
- Start Melora: In Visual Studio, press the "⯈ Melora (Unpackaged)" button. This will launch Melora with your plugin automatically loaded.
- You should see a notification in the bottom right corner of Melora indicating that your plugin has been loaded.
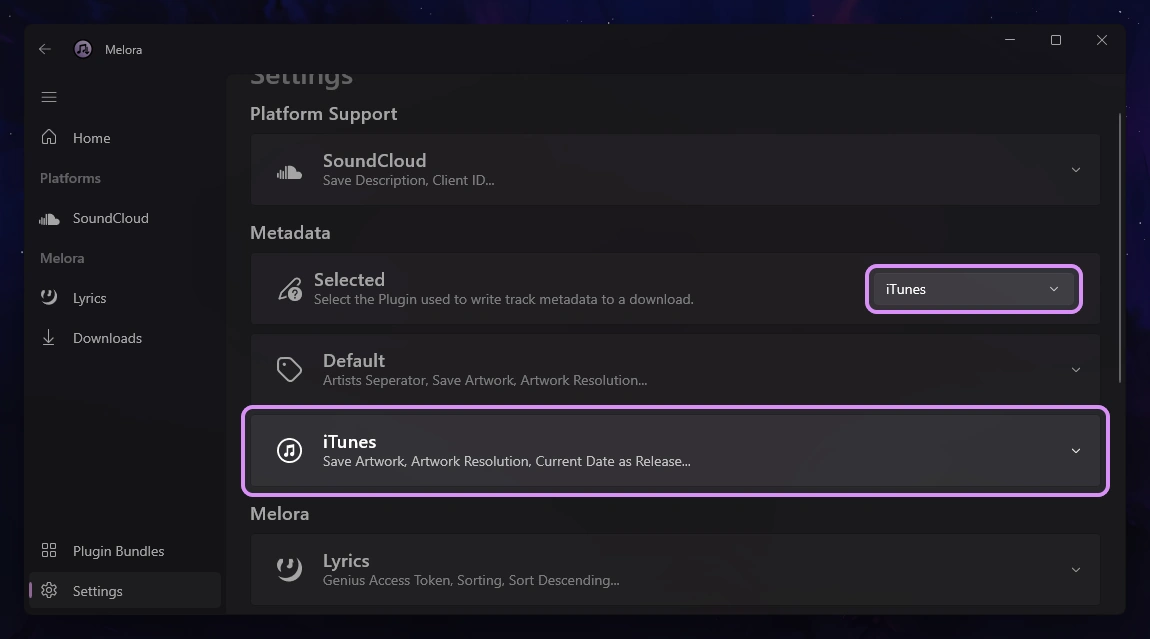
- On the Settings page under the Metadata section, your plugin should be visible. You can now also make it the Selected.

Step 5: Writing Metadata
Now lets get to the actual coding part. To implement metadata writing, you need to override the WriteAsync method in your plugin class. This method will handle embedding metadata into the downloaded audio file. This method provides:
| Parameter | Description |
|---|---|
string filePath | The path to the audio file. |
DownloadableTrack track | The downloadable track containing the metadata. |
CancellationToken cancellationToken | A token to handle cancellation requests. |
High-Level Overview:
- Load Audio File: Use an audio metadata library to open and process the audio file located at filePath.
- Write Metadata: Extract the metadata from the DownloadableTrack object and write it to the audio file.
- Save Audio File: Save the updated audio file with the new metadata back to the specified path.
Example:
This is a shorten version. You can see the entire source code on GitHub.
public override async Task WriteAsync(
    string filePath,
    DownloadableTrack track,
    CancellationToken cancellationToken = default)
{
    logger?.LogInformation("[ITunesPlugin-WriteAsync] Starting to write track metadata...");

    Track file = new(filePath);
    if (file.AudioFormat.ShortName != "MPEG-4")
        throw new Exception("This Metadata Plugin only support writing audio files in 'MPEG-4' format.", new("Please select '4a' as the download format in your Platform-Support Plugin."));

    string mediaType = Config.GetSelectableOption("Media Type");
    string account = Config.GetStringOption("Account");
    ...

    // Default fields
    file.Title = track.Title;
    file.Artist = track.Artists.Replace(", ", "; ");
    ...

    // Sorting
    file.SortTitle = file.Title;
    file.SortArtist = file.Artist;
    ...

    // Additional fields
    if (mediaType == "Podcast")
        file.AdditionalFields["pcst"] = "1"; // PODCAST
    else
        file.AdditionalFields["stik"] = mediaType switch // ITUNESMEDIATYPE
        {
            "Music" => "1",
            "Audiobook" => "2",
            "Music Video" => "6",
            "Movie" => "9",
            "TV Show" => "10",
            "Booklet" => "11",
            "Ringtone" => "13",
            "iTunes U" => "23",
            _ => "1"
        };
    file.AdditionalFields["apID"] = account; // ITUNESACCOUNT
    ...

    // Picture field
    ...

    await file.SaveAsync();
    logger?.LogInformation("[ITunesPlugin-WriteAsync] Wrote track metadata");
}
Step 6: Validate
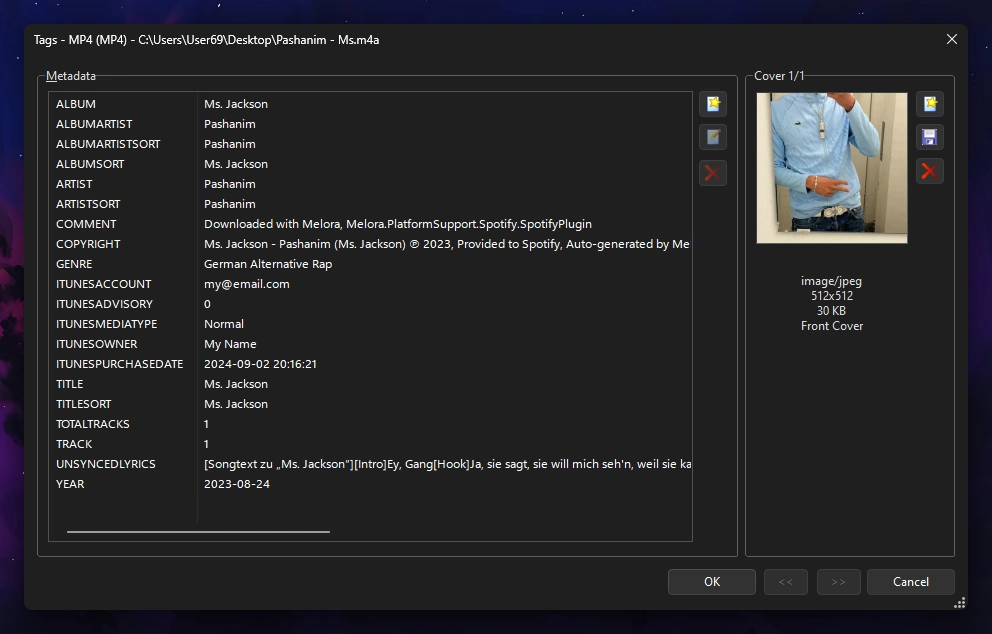
To make sure your Metadata Plugin works as expected, you can use Metadata editors like Mp3tag. This allows you to easily check the metadata tags for all kind of audio formats.

Publishing
If you’ve followed the guide successfully, you should now be able to write the Metadata for tracks seamlessly. Before you publish, make sure to test everything thoroughly to ensure that your plugin functions as expected.
Once you’ve verified that everything works properly, refer to the Publishing Guide to list your plugin in the official Melora Plugin Collection.
